What to Document on Every Construction Site Visit for Accurate Progress Tracking
Tracking construction progress week by week is more than a matter of checking boxes on a schedule. The real value lies in having a consistent, comparable record that shows what has changed since the last visit. Without a standard checklist, site supervisors, project managers, and clients can end up relying on memory or scattered photos that miss key details. A methodical approach to documentation, supported by aerial site imagery, turns each site visit into a reliable data point for the whole project timeline.
Before You Arrive: Prepare Your Reference Materials
A productive site visit starts before you leave the office. Pull up the previous visit's documentation, including the latest aerial site imagery, and compare it against the current construction schedule. Note which areas were expected to move forward since the last capture. Having this reference in hand means you know exactly what to verify on the ground. It also helps you spot discrepancies between the planned timeline and actual progress before you even step onto the site.
Make sure your camera or drone is charged, your storage media is formatted, and your checklist is printed or loaded on a tablet. If you are using a project portal that stores all captures in one place, confirm that the previous data is accessible offline in case of poor connectivity on site.
Exterior Progress: The Big Picture
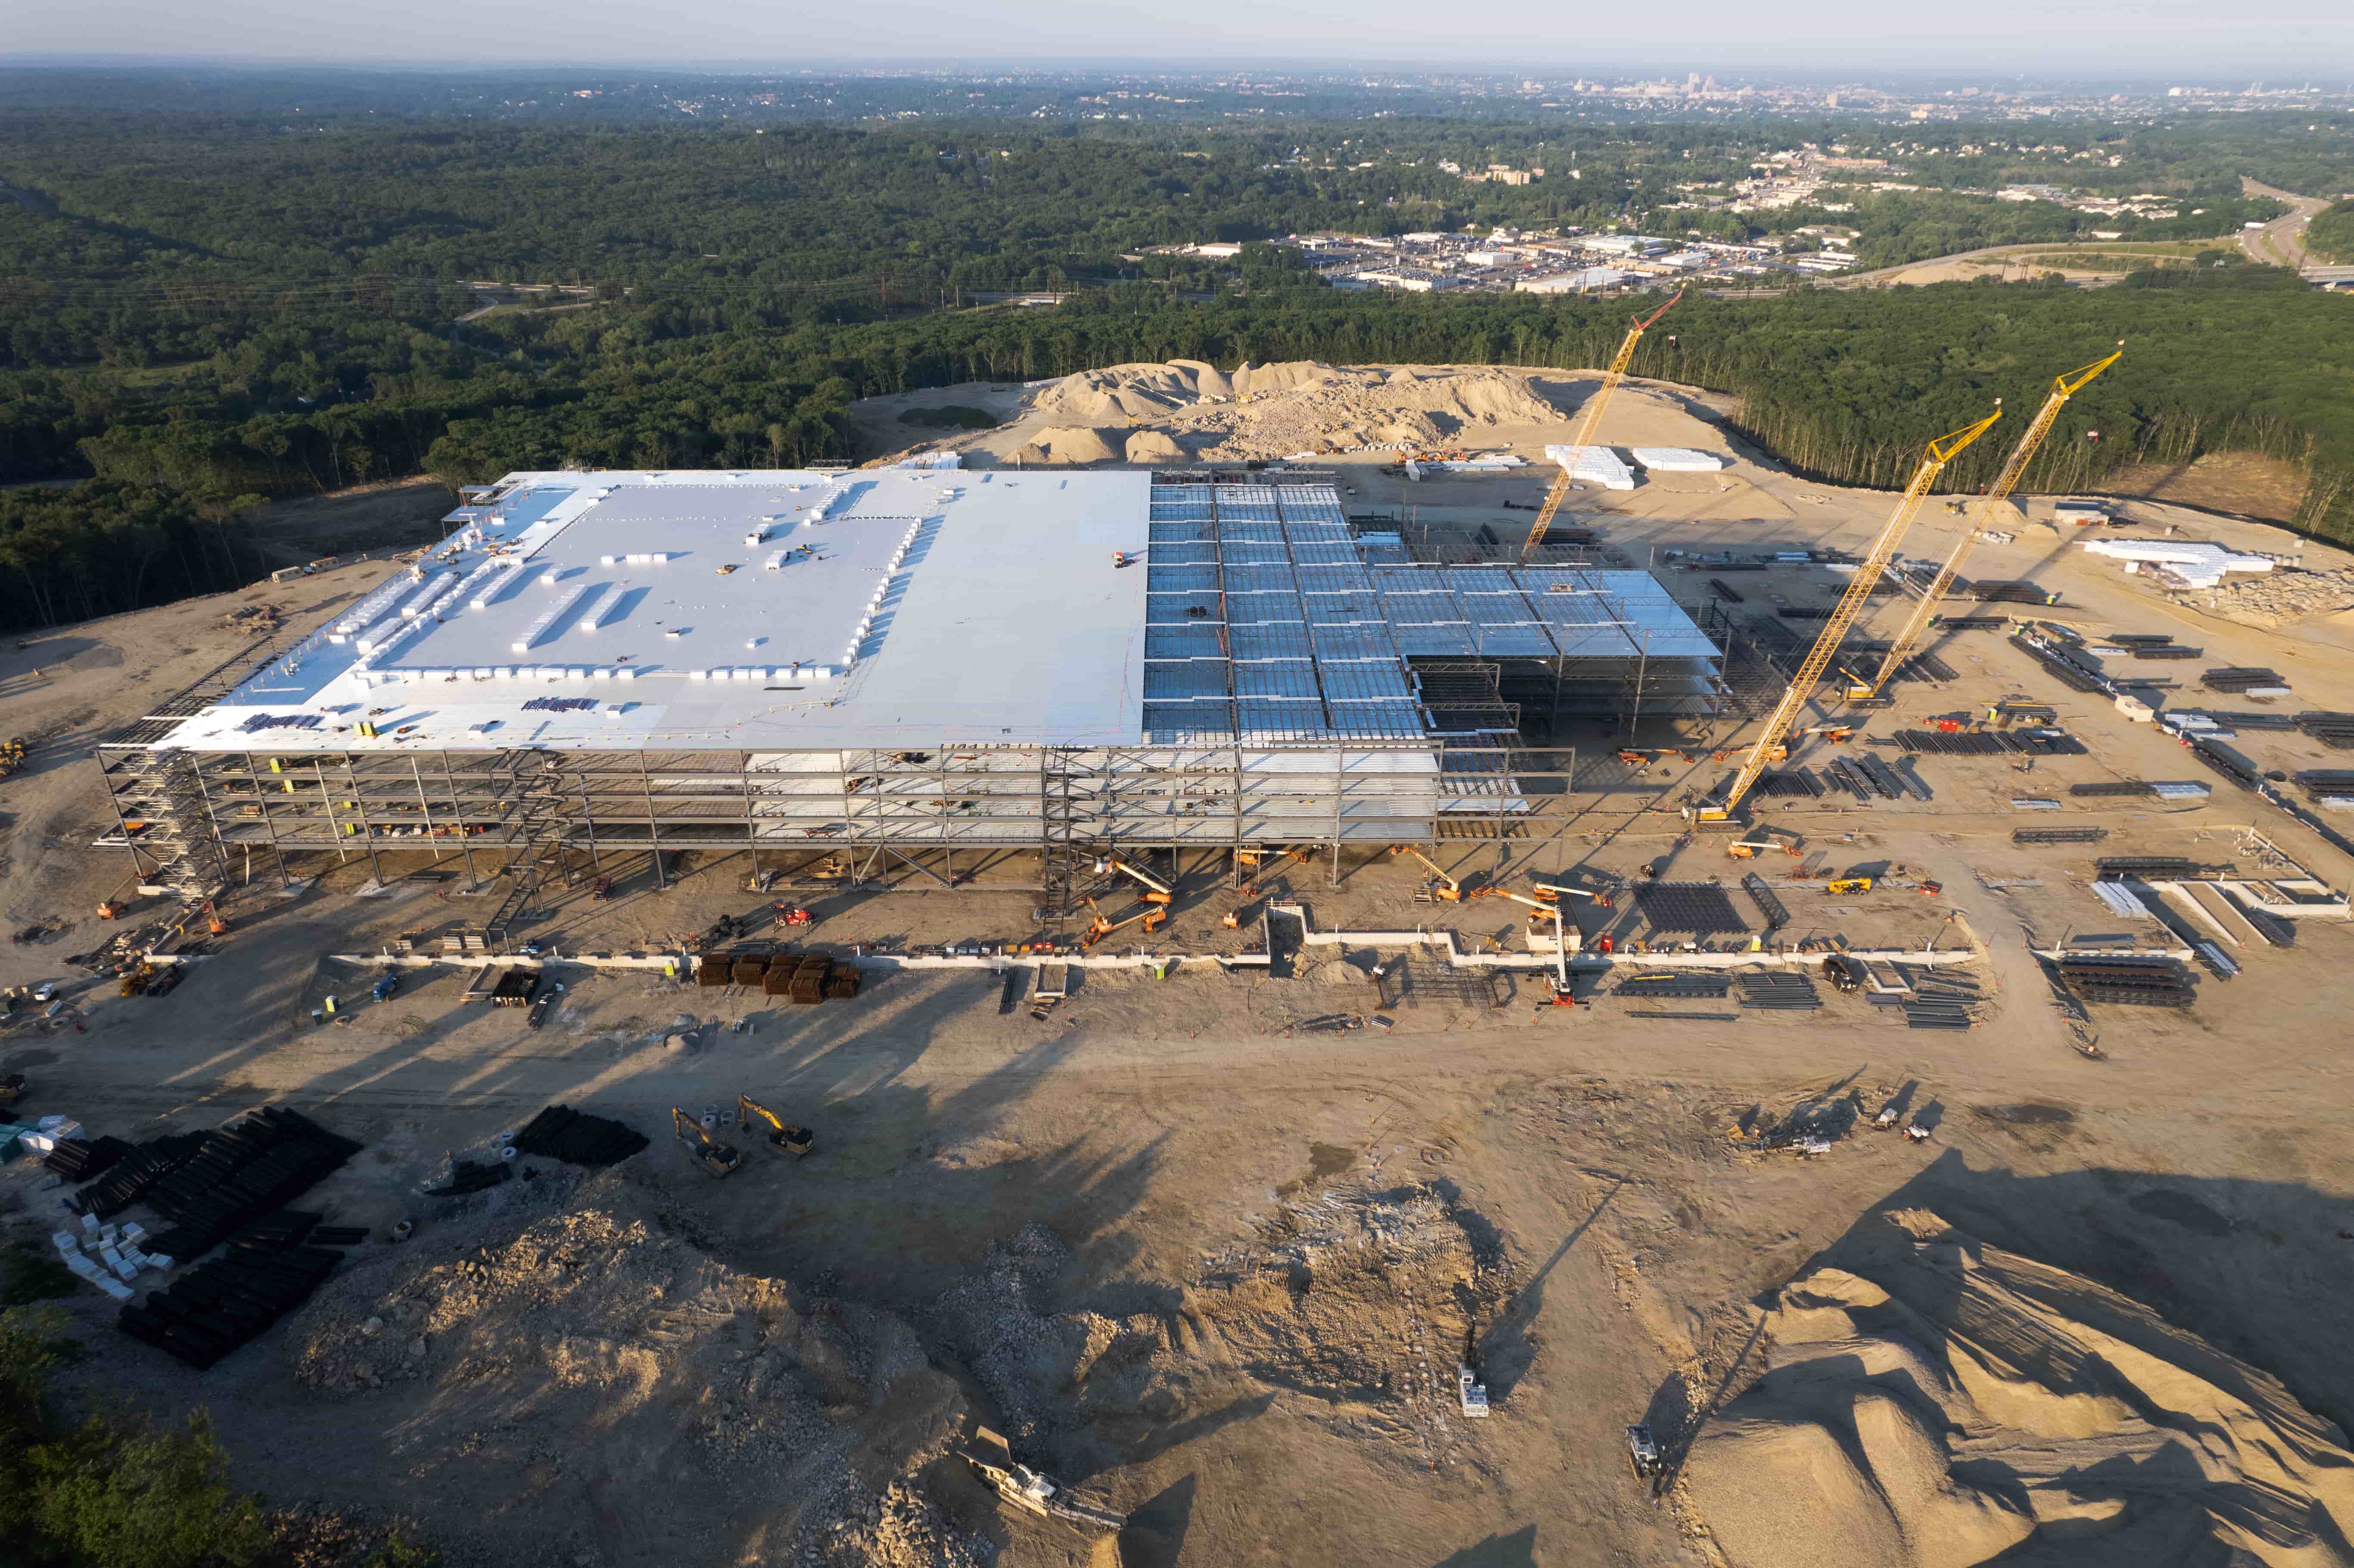
Start with a wide view of the entire site. This is where aerial site imagery becomes invaluable. A drone capture taken from a consistent altitude and angle each visit gives you a direct overlay of the previous week's shot. You can see new foundations, steelwork rising, roofing progress, or site clearing completed. The reason this matters is simple: a single overhead image often reveals layout changes that are invisible from ground level, such as shifted material stockpiles, new access roads, or the outline of a building that has just been framed.
While capturing the wide view, note the building stage of each major structure. Is the foundation poured and cured? Is the steel skeleton up? Has the roof deck been installed? Record these observations alongside the capture date so that the visual record can be cross-referenced with the project milestone chart later. If any part of the site appears to be behind or ahead of schedule, document it with both a photograph and a written note.
Key exterior points to check:
- Overall site layout and access routes
- Foundation work for each building or structure
- Vertical construction progress (steel, concrete, framing)
- Roofing progress and weatherproofing status
- Site drainage and grading changes
Interior Progress: Step Inside the Shell
Once the building envelope is closed, interior documentation becomes critical. Use a combination of ground-level photographs and, if possible, 360 panoramas to capture each floor or zone. Focus on mechanical, electrical, and plumbing rough-ins before they are hidden behind drywall. These are the elements that are hardest to verify later. A single photograph of a wall cavity before it is closed can save weeks of troubleshooting if a problem arises.
For each interior zone, record the finishing stage: are the walls framed, insulated, boarded, taped, or painted? Is the flooring substrate in place? Are ceiling grids installed? These details feed directly into the progress report and help the project team adjust the construction schedule when one trade is delayed.
Essential interior documentation items:
- MEP rough-ins before concealment
- Wall, floor, and ceiling finishes by room
- Installation of fixtures and fittings
- Accessibility features and path-of-travel compliance
- Final trim and punch-list items
Safety and Site Conditions
Every site visit is also an opportunity to assess safety and site conditions. Look for housekeeping issues, blocked fire exits, missing guardrails, or unsecured materials. These observations belong in the documentation because they affect the schedule and the project's risk profile. A clean, well-organised site tends to move faster and have fewer accidents. A cluttered one may indicate that the general contractor is stretched or that coordination between trades is breaking down.
Also note weather conditions on the day of the visit. Rain, snow, or extreme heat can delay concrete pours, roofing work, or exterior finishes. Recording the weather alongside the capture date helps explain why a particular building stage took longer than planned. This context turns a simple progress report into a useful diagnostic tool.
How Aerial Site Imagery Fits Into the Checklist
Aerial site imagery is not a replacement for ground-level documentation. It is a complement that fills in the gaps. An overhead capture shows the relationship between structures, material laydown areas, and site access roads in a way that no ground photo can. When you combine it with ground-level shots and 360 panoramas, you get a complete picture of the site at a given moment. That combination makes it much easier to verify that the work matches the approved plans and that no unexpected deviations have occurred.
For projects that involve multiple buildings or phased construction, the aerial view is especially useful. It shows which phases are active, which are complete, and where the next phase will begin. This bird's-eye perspective is also valuable for stakeholder presentations and for resolving disputes about progress. A well-documented aerial image taken on a known capture date carries more weight than a vague recollection of what was seen two weeks ago.
Organising Your Records for Later Use
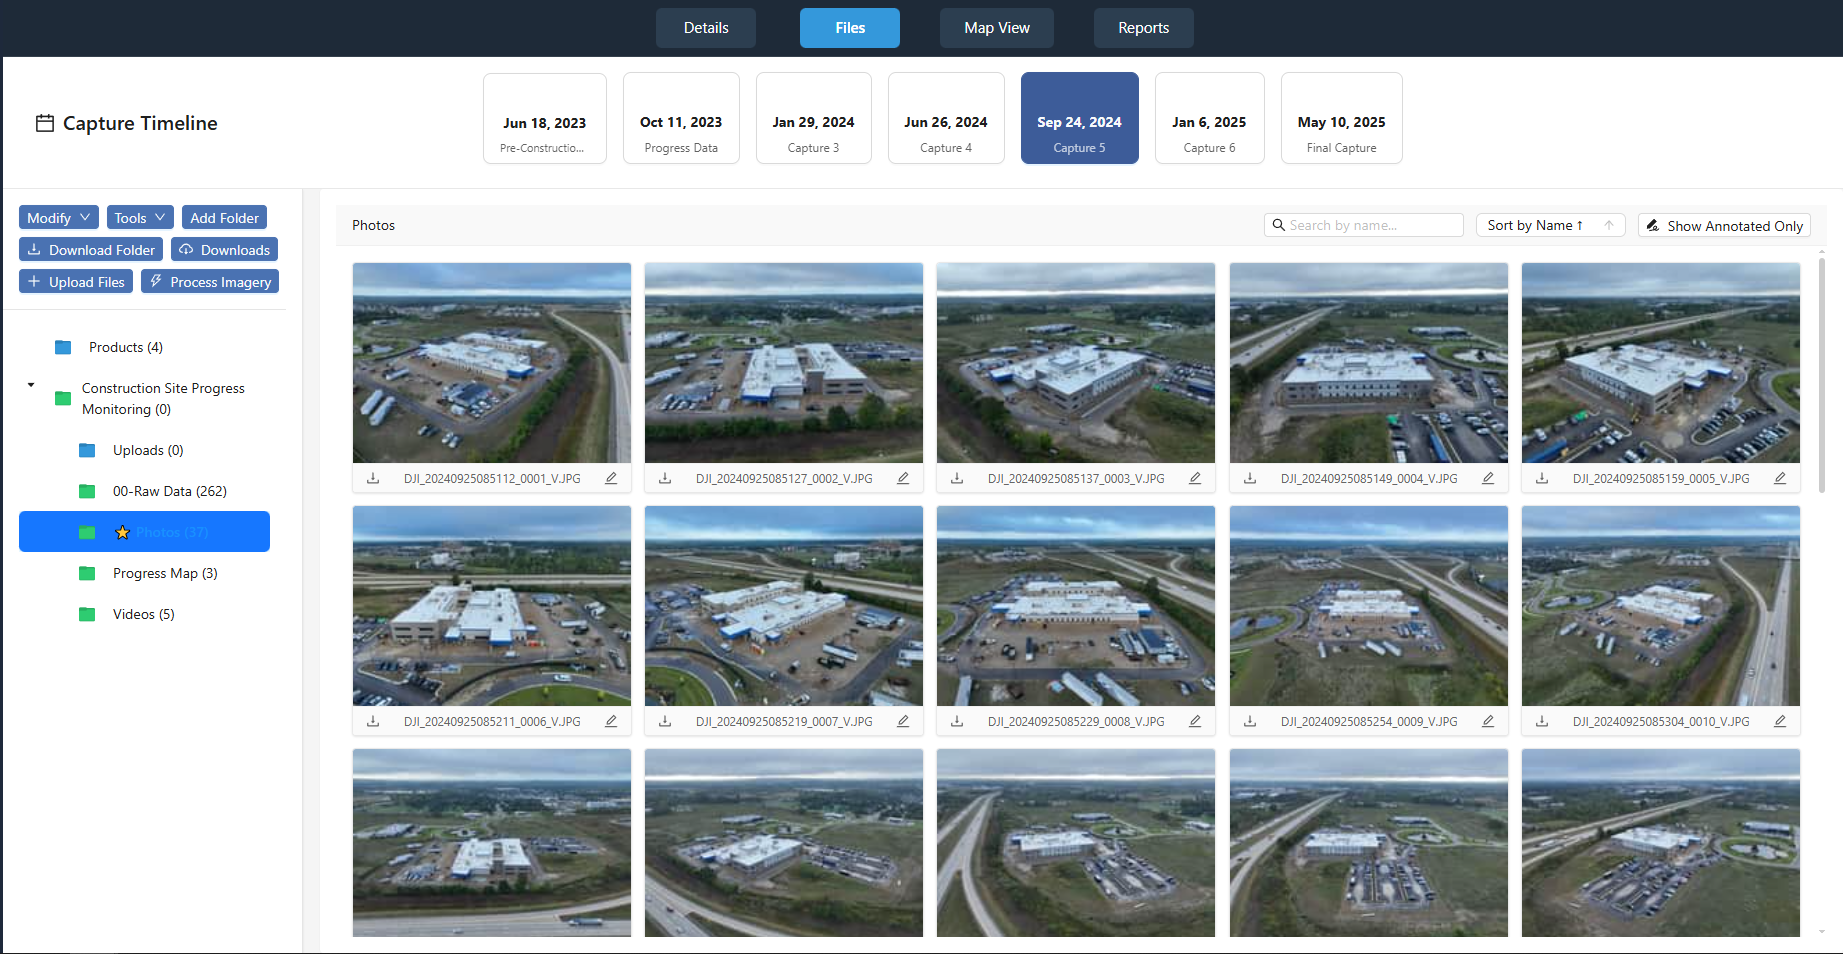
The value of a site visit checklist diminishes if the resulting documentation is not organised in a way that makes it easy to retrieve later. A project portal that stores all captures, aerial site imagery, 3D models, and panoramas in one place is the ideal solution. National Drone Services provides coordinated construction progress drone captures with aerial maps, 3D models, site imagery, and 360 panoramas organised in a project portal. This structure allows you to pull up any previous visit's documentation in seconds, compare it side by side with the current visit, and generate a progress report that is both visual and quantitative.
When you file your documentation, use a consistent naming convention that includes the project name, the capture date, and a brief descriptor of the area captured. Tag each image or model with the relevant building stage and project milestone. This discipline pays off when the project is audited, when a client requests a timeline review, or when a new team member needs to get up to speed quickly. A well-organised archive is as valuable as the data itself.
Common Pitfalls to Avoid
Even with a checklist, some mistakes recur. One is taking photographs without a reference object or scale. A photo of a concrete slab means little unless you can see a person, a tape measure, or a known dimension in the frame. Another is failing to capture the same viewpoint on each visit. Consistency of angle and altitude is what makes aerial site imagery comparable over time. If you change the flight path or the camera settings each time, you lose the ability to overlay images and see change.
A third pitfall is neglecting to document negative findings. If a particular area has not progressed since the last visit, that is important information. It may indicate a material shortage, a trade conflict, or a weather delay. Recording it keeps the project team honest and helps the schedule stay realistic. Finally, do not rely on memory to fill in details later. Write notes and tag photos on the same day as the visit. A delay of even 24 hours can blur the specifics of what you saw.
Turning Documentation Into Decisions
The ultimate purpose of a site visit checklist is not to create a pile of data. It is to give decision-makers the information they need to keep the project on track. When progress is documented thoroughly and consistently, the project manager can spot trends, adjust the construction schedule before small delays compound, and communicate clearly with the owner and the design team. The same documentation also serves as a legal record if disputes arise over change orders, delays, or quality of work.
National Drone Services helps by providing a structured way to capture and store that data, but the discipline of what to check and how to record it rests with the site team. A checklist that covers exterior progress, interior finishes, site conditions, and safety observations ensures that nothing is missed. Combined with regular aerial site imagery, it gives you a complete, reliable record from the first shovel of dirt to the final punch list.
Every site visit is a chance to improve the accuracy of your project's story. With a solid checklist, you can make sure that story is told truthfully, with clear evidence at every milestone.